SNAP.FAN
Cards

Cards

All Cards Variants Variant Categories Variant Artists Ultimate Variants Exquisite Variants Sensational Variants Amazing Variants

Series

Series 1 Series 2 Series 3 Series 4 Series 5 Series Changes

Updates

Spotlights Balance History

Cosmetics

Card Backs Emotes Titles Card Split Effects Borders Reveal Effects Reactions
Meta

Decks

Deck Tier List Deck Builder Draft Builder
Bundles
News

Articles

News Guides Patch Notes Changelog Schedule

Database

Locations Limited Events Grand Arena Team Clash Packs Albums Seasons

Friends of Snap.fan

Battle Arena Snap Back Podcast
Schedule
Menu
  • Cards
    Cards
    All Cards Variants Variant Categories Variant Artists Ultimate Variants Exquisite Variants Sensational Variants Amazing Variants
    Series
    Series 1 Series 2 Series 3 Series 4 Series 5 Series Changes
    Updates
    Spotlights Balance History
    Cosmetics
    Card Backs Emotes Titles Card Split Effects Borders Reveal Effects Reactions
  • Meta
    Decks
    Deck Tier List Deck Builder Draft Builder
  • Bundles
  • News
    Articles
    News Guides Patch Notes Changelog Schedule
    Database
    Locations Limited Events Grand Arena Team Clash Packs Albums Seasons
    Friends of Snap.fan
    Battle Arena Snap Back Podcast
  • Schedule
  • Home
  • Guides
  • Snowguard : A Snapper's Guide

Snowguard : A Snapper's Guide

Guides
BEWD September 19, 2023

How to Play Snow Guard

From Hawk-ward to Bear-able

A Guide to Snowguard

Snowguard recently received a rework patch on September 5, 2023. The Snowguard rework changed the card’s purpose from being utilized for Hot and Featured locations to a card that has a deck-building identity. The current rendition of Snowguard adds the hawk and bear to your hand. The bear card remained the same, but the Hawk’s text changed from “On Reveal: Ignore all location abilities next turn” to “On Reveal: Ignore all location abilities until the end of next turn (or the game)”.

Snowguard
Snowguard
On Reveal: Add the Hawk and Bear auroras to your hand.

Although this rework and text changes were supposed to alleviate confusion, it does take a lot of understanding to effectively use the Hawk and Bear. The Bear is more straightforward but has fewer locations to interact with, while the Hawk has more impact on how turns and the end of the game are affected. To understand both of these cards a little more fluidly, I will break down the locations into five different sections: passive, effect, on reveal, ongoing, and turn-based. In these sections, I will explain how the hawk and bear interact with the locations within each section. Afterwards, I will provide some deck lists that have implemented Snowguard, as the card has had a positive impact on the current meta in Marvel Snap.

Passive

Passive locations are calculated at the end of the game. These locations will always reactivate even if the Hawk has been played on the final turn of the game to factor into the final score of the game. Playing the hawk outside of the final turn of the game will allow you to access these locations to play on them. The bear has no effect on any of these locations outside of providing its power towards that location’s lane.

Atlantis
Atlantis
If you only have one card here, it has +5 Power.
Bar With No Name
Bar With No Name
Whoever has the least Power here wins.
Baxter Building
Baxter Building
Whoever is winning this location gets +4 Power at the others.
Deep Space
Deep Space
Card text is disabled here.
Isle of Silence
Isle of Silence
Ongoing effects are disabled here.
Lake Hellas
Lake Hellas
1-Cost cards here have +2 Power.
Mojoworld
Mojoworld
Whoever has more cards here gets +100 Power.
Monster Metropolis
Monster Metropolis
The card(s) with the highest Power here get +3 Power.
Necrosha
Necrosha
Cards here have -2 Power.
Negative Zone
Negative Zone
Cards here have -3 Power.
Nidavellir
Nidavellir
Cards here have +5 Power.
Onslaught's Citadel
Onslaught's Citadel
Ongoing effects here apply an additional time.
Sewer System
Sewer System
Cards here have -1 Power.
The Nexus
The Nexus
Your Power here is granted to other locations as well.
Throne Room
Throne Room
The highest-Power card(s) here have their Power doubled.
Washington D.C.
Washington D.C.
Cards here with no abilities have +3 Power.
Xandar
Xandar
Cards here have +1 Power.

Atlantis: If you play the Hawk on turn 6, the calculations will still factor in if the opponent has one card at the location for the final scoring.

Atlantis
Atlantis
If you only have one card here, it has +5 Power.

Deep Space: This location will trigger a card's ongoing effect when played after the Hawk has been played but will return the location's state during calculations. On reveal cards with a lingering effect will be active after the next turn. For example, if you play Iron-Man after the Hawk was played the previous turn or on the same turn the Hawk was played, you will receive the double location power. The ongoing effect will trigger until the calculations phase, during which it will revert to the location’s passive ability and the ironman’s ongoing ability will not be affected. Another example is if you play Hawk on turn 3 and then Rescue on turn 4, you will have the chance to complete Rescue’s on reveal.

Deep Space
Deep Space
Card text is disabled here.
Rescue
Rescue
On Reveal: If you play a card at this location next turn, +5 Power.

Necrosha: The negative power will be disabled during the turn and reflect throughout the next turn after the Hawk has been played, but will revert back to the negative power state during the calculations phase.

Necrosha
Necrosha
Cards here have -2 Power.


Effect

These locations have repercussions for interacting on this lane. The Hawk can remove the repercussions of this location for the turn it was played and for the next turn (if not already prompted by an interaction). The Bear cannot retrigger the repercussion if the interaction on this lane has already been prompted. These locations are a mixture of ongoing and turn based locations that manipulate the locations repercussions without reverting or affecting the end of the game or calculations phase.

Aunt May's
Aunt May's
The next card you play here gains +3 Power and moves.
Jotunheim
Jotunheim
End of Turn: Cards here lose 1 Power.
Muir Island
Muir Island
End of Turn: Give cards here +1 Power.
Quantum Realm
Quantum Realm
After you play a card here, set its base Power to 2.
Quantum Tunnel
Quantum Tunnel
After you play a card here, swap it with a card in your deck.
Rickety Bridge
Rickety Bridge
End of Turn: If there is more than one card here, destroy them.
Sacred Timeline
Sacred Timeline
First to fill this gets a copy of their opening hand.
The Raft
The Raft
First to fill this breaks out a 6-Cost card. It costs 0.
Vormir
Vormir
The next card you play here is destroyed.
Warrior Falls
Warrior Falls
End of Turn: Cards here FIGHT! Destroy the weakest one(s).
White Hot Room
White Hot Room
First to fill this gets +3 Max Energy.

Aunt May’s: If you play Hawk into Aunt May, it will stop all cards played after the Hawk, including the Hawk itself, on the same turn from triggering on Aunt May's, as well as all cards played next turn if the repercussion hasn’t been met prior to the Hawk being revealed. Once the repercussions have been met, the bear will not allow your next card to be played at this location to be moved and receive the buff again.

Aunt May's
Aunt May's
The next card you play here gains +3 Power and moves.

Jotunheim: Cards at this location will not receive the afflicted -1 power during the turn the Hawk was played or the following turn. The Bear can’t double up on the affliction. If the Hawk is played at this location on turn 6, the location's repercussions will not retrigger at the end of the game or during calculations.

Jotunheim
Jotunheim
End of Turn: Cards here lose 1 Power.

Rickety Bridge: Hawk will stop the repercussions of this location on turn 6 at the end of the game and calculations phase.

Rickety Bridge
Rickety Bridge
End of Turn: If there is more than one card here, destroy them.


On Reveal

When these locations are revealed, action is prompted. This action can be retriggered by the Bear. The Hawk’s only interaction with these locations is that they are ignored for that turn and the next turn. If you come across an instance where you have to use the Hawk to interact with the other locations that aren’t on reveal and a on reveal location is revealed the next turn, you can still prompt the action when you play the bear. For example, if on turn 2 you play Hawk and an on reveal location is revealed on turn 3 but is disabled, you can prompt the action with the bear being played at that location if desired.

Camp Lehigh
Camp Lehigh
Add a random 3-Cost card to each player's hand.
Central Park
Central Park
Add a Squirrel to each location.
Collapsed Mine
Collapsed Mine
Fill this location with Rocks. Skip a turn to destroy your Rocks.
Daily Bugle
Daily Bugle
Get a copy of a card in your opponent's hand.
District X
District X
Replace both decks with 10 random cards.
Hell's Kitchen
Hell's Kitchen
Draw a 1-Cost card from your deck.
Lamentis-1
Lamentis-1
Draw 3 cards. Banish both decks.
Monster Island
Monster Island
Add a 10-Power Monster here for each player.
Nova Roma
Nova Roma
Draw a card.
Olympia
Olympia
Draw 2 cards.
Project Pegasus
Project Pegasus
+5 Energy this turn.
Savage Land
Savage Land
Add two Raptors on each side of this location.
Shadowland
Shadowland
Add a Ninja to each side with -2 Power.
Sokovia
Sokovia
Discard a card from each player's hand.
Subterranea
Subterranea
Shuffle 4 rocks into each deck.
The Hub
The Hub
Add a random card to each player's hand.
The Ice Box
The Ice Box
Give a card in each player’s hand +1 Cost.
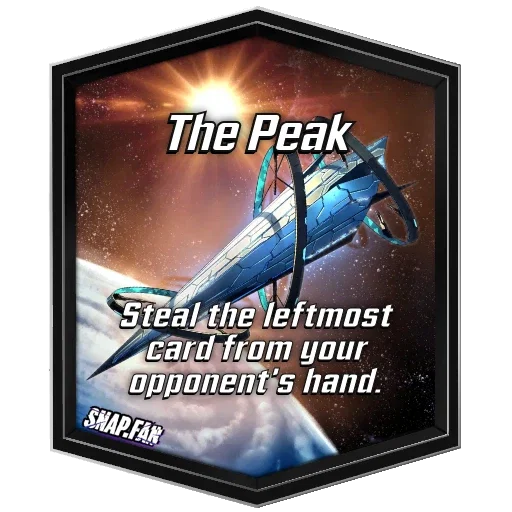
The Peak
The Peak
Steal the leftmost card from your opponent's hand.
The Triskelion
The Triskelion
Fill each player's hand with random cards.
Tinkerer's Workshop
Tinkerer's Workshop
+1 Energy this turn.
Wakandan Embassy
Wakandan Embassy
Give +2 Power to cards in players' hands.
Worldship
Worldship
Destroy the other locations.

Collapsed Mine: When playing the Bear on this location after the Rocks have been destroyed, the rocks will retrigger in both lanes with the same conditions to destroy the rocks.

Collapsed Mine
Collapsed Mine
Fill this location with Rocks. Skip a turn to destroy your Rocks.

Project Pegasus: The Bear will retrigger the energy gain for the next turn.

Project Pegasus
Project Pegasus
+5 Energy this turn.

The Peak: Retrigger the effect for this location with the Bear. For cards that were already affected the first time by this location, the retriggering will swap the power and cost to the most current power and cost levels. An example of this is if Infinaut is hit by the peak before the Bear is played, the card won’t be reverted to a 6 cost and 20 power when the Bear is played and The Peak is triggered for the second time on Infinaut. Infinaut’s cost will become 6, and its power will be 6, as that would reflect the current stats of Infinaut prior to the second peak trigger.

The Peak
The Peak
Steal the leftmost card from your opponent's hand.

The Infinaut
The Infinaut
If you played a card last turn, you can't play this.


Ongoing

These locations have continual repercussions throughout the game. The Hawk is able to cancel the ongoing effect for these locations for a turn, and it won’t have any factor on the end of the game or calculation phases. The main purpose of canceling these locations is to prevent the opponent from benefiting from the positive effects that ongoing locations provide. Another factor in playing the Hawk at these locations is to avoid the negative effects that may be provided by specific ongoing locations. The Bear does not have any effect on ongoing locations. Do note that conditions are felt by your opponent as well as yourself.

Altar of Death
Altar of Death
After you play a card here, destroy it to get +2 Energy next turn.
Asteroid M
Asteroid M
After you play a 3 or 4-Cost card, move it here.
Bar Sinister
Bar Sinister
After you play a card here, fill this location with copies of it.
Cloning Vats
Cloning Vats
After you play a card here, add a copy to your hand.
Crimson Cosmos
Crimson Cosmos
Cards that cost 3 or less can't be played here.
Danger Room
Danger Room
Cards played here have a 25% chance to be destroyed.
Death's Domain
Death's Domain
After you play a card here, destroy it.
Ego
Ego
Ego takes over and plays your cards for you.
Elysium
Elysium
Cards cost 1 less.
Fisk Tower
Fisk Tower
When a card moves here, afflict it with -4 Power.
Flooded
Flooded
Cards can't be played here.
Hellfire Club
Hellfire Club
Cards that cost 1 can't be played here.
K'un-Lun
K'un-Lun
When a card moves here, give it +2 Power.
Kamar-Taj
Kamar-Taj
On Reveal effects at this location repeat.
Knowhere
Knowhere
On Reveal effects do not happen at this location.
Lechuguilla
Lechuguilla
After you play a card here, shuffle 3 rocks into your deck.
Limbo
Limbo
There is a turn 7 this game.
Luke's Bar
Luke's Bar
After you play a card here, return it to your hand.
Machineworld
Machineworld
After you play a card here, add a copy to the opponent's hand.
Morag
Morag
You can't play your first card here each turn.
Orchis Forge
Orchis Forge
After you play a card here, add a Sentinel to your hand.
Ruins
Ruins
Sanctum Sanctorum
Sanctum Sanctorum
Cards can't be played here.
Shuri's Lab
Shuri's Lab
After you play a card here, double its Power.
Sinister London
Sinister London
After you play a card here, add a copy to another location.
The Big House
The Big House
Cards that cost 4 or more can't be played here.
The Space Throne
The Space Throne
Only one card can be here for each player.
The Superflow
The Superflow
If you have no cards here, +1 energy each turn.
Time Theater
Time Theater
Copy the last card you drew instead of drawing your next card.
Titan
Titan
6-Cost cards cost 1 less.
Vibranium Mines
Vibranium Mines
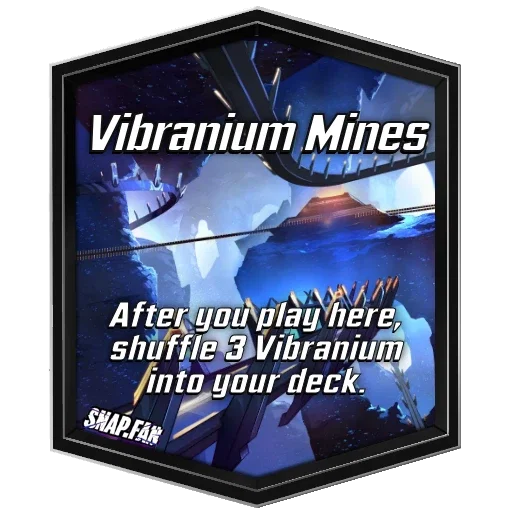
After you play here, shuffle 3 Vibranium into your deck.
Wakanda
Wakanda
Cards here can't be destroyed.
Weirdworld
Weirdworld
Draw 2 cards from your opponent's deck.

Asteroid M: Playing the Hawk will allow you to freely play 3 and 4 cost cards at any location while this location is inactive.

Asteroid M
Asteroid M
After you play a 3 or 4-Cost card, move it here.

Limbo: The Hawk will prevent turn 6 from happening. To gain this effect, the Hawk must be played and triggered on turn 5 or 6.

Limbo
Limbo
There is a turn 7 this game.

Morag: Disable the condition of playing at another lane prior to playing here for the next turn (technically, for the same turn, Hawk was played, but ideally, you can meet the location’s repercussions by playing Hawk first + another card).

Morag
Morag
You can't play your first card here each turn.

Shuri’s Lab: If you are ahead at this location, shut the location down to prevent your opponent from catching up, factoring in the doubling of a card’s power for the turn the Hawk was played and the next turn.

Shuri's Lab
Shuri's Lab
After you play a card here, double its Power.

The Superflow: Accidentally have a card on Superflow? Prevent your opponent from gaining extra energy the next turn by using the Hawk to cancel this location.

Weirdworld: Do you want to reprise the glory of your deck for one turn? Play the Hawk and top deck that card that will change the tide of battle in your favor (hopefully)

Weirdworld
Weirdworld
Draw 2 cards from your opponent's deck.


Turn-based

These locations are not retriggered by the Bear but can provide excellent opportunities with the Hawk’s abilities. Turn based locations take some planning, as the hawk can allow you to ignore that location's effect if played on the appropriate turn for the Hawk’s turn and the coming turn.

Asgard
Asgard
After turn 4, whoever is winning here draws 2 cards.
Attilan
Attilan
After turn 3, shuffle your hand into your deck. Draw 3 cards.
Avengers Compound
Avengers Compound
On turn 5, all cards must be played here.
Dark Dimension
Dark Dimension
Cards here are not revealed until the game ends.
Dream Dimension
Dream Dimension
On turn 5, cards cost 1 more.
Eternity Range
Eternity Range
After turn 3, add a Rock to the losing player's side.
Flooding
Flooding
This is the last turn cards can be played here.
Gamma Lab
Gamma Lab
After turn 3, transform all cards here into the Hulk.
Grand Central
Grand Central
After turn 5, put a card from each player's hand here.
Great Web
Great Web
End of Turn: Move one card to the Web for a random player.
Hala
Hala
After turn 4, destroy all cards controlled by the player losing here.
Klyntar
Klyntar
After turn 4, merge your cards here into a Symbiote.
Kyln
Kyln
You can't play cards here after turn 4.
Los Diablos Base
Los Diablos Base
After turn 3, ruin a random location.
Lemuria
Lemuria
No cards are revealed this turn.
Mindscape
Mindscape
At the start of turn 6, swap hands.
Miniaturized Lab
Miniaturized Lab
On turns 3, 4, and 5, no cards can be added here.
Mirror Dimension
Mirror Dimension
On turn 4, transform into one of the other locations.
Mount Vesuvius
Mount Vesuvius
Players can't retreat after turn 5.
Murderworld
Murderworld
After turn 3, destroy all cards here.
New York
New York
On turn 6, cards are Moveable to here.
Oscorp Tower
Oscorp Tower
After turn 3, all cards here switch sides.
Pet Mansion
Pet Mansion
This turn, all cards must be played here.
Sakaar
Sakaar
After this turn, put a card from each player's hand here.
Stark Tower
Stark Tower
After turn 5, give all cards here +2 Power.
Starlight Citadel
Starlight Citadel
After turn 4, swap the position of each location.
Strange Academy
Strange Academy
After turn 5, move all cards here to other random locations.
The Bifrost
The Bifrost
After turn 4, move all cards one location to the right.
The Vault
The Vault
On turn 6, cards can't be played here.
TVA
TVA
After turn 4, end the game.
Valley Of The Hand
Valley Of The Hand
After turn 5, your destroyed cards revive here.
Westview
Westview
Turns into a new location on turn 4.
X-Mansion
X-Mansion
After turn 3, add a random card here for each player.
Yashida Base
Yashida Base
At the end of the game, destroy the last card to get here.

Asgard: Can’t catch up at this location? Play the Hawk on turn 3 or 4 to disable this location and prevent your opponent from receiving the benefit.

Asgard
Asgard
After turn 4, whoever is winning here draws 2 cards.

Dark Dimension: When the Hawk is played, all unrevealed cards that were previously played are revealed and will continue to be revealed until the end of the game. For example, Rocket Raccoon is placed in the Dark Dimension on turn 1. Snowguard is played on turn 2 to play Hawk on turn 3. Once Hawk is revealed on turn 3, Rocket Raccoon is revealed in the Dark Dimension. Turn 5 would return the Dark Dimension passive to reveal any other cards played in this lane on the remaining turns to be revealed at the end of the game phase.

Dark Dimension
Dark Dimension
Cards here are not revealed until the game ends.
Rocket Raccoon
Rocket Raccoon
On Reveal: If your opponent played a card here this turn, +4 Power.

Klyn: Do you want to sneak something into this location? Play the Hawk to do so on your next turn.

Kyln
Kyln
You can't play cards here after turn 4.

Los Diablos Base: Do you have locations that benefit you? Protect them with the Hawk being played on turn 2 or 3. Call the card Hawk Armor after you complete this feat.

Los Diablos Base
Los Diablos Base
After turn 3, ruin a random location.

Mount Vesuvius: Do you want to retreat on turn 6? Play the Hawk on turn 5 to have that choice if you don’t find a winning line.

Mount Vesuvius
Mount Vesuvius
Players can't retreat after turn 5.

TVA: Do you want to spend more time with your opponent? Stop the game from ending by playing the Hawk on turn 3.

TVA
TVA
After turn 4, end the game.


Final Thoughts

The rework of Snowguard has provided versatility and identity for the card. Locations play a huge role in the gameplay of Marvel Snap. The ability to manipulate locations in a positive or negative way is crucial. The important aspect to get used to is using your Hawk and Bear effectively to have a more positive outcome for your gameplay in comparison to your opponent. I hope that this guide helped you understand how the Hawk and Bear interact with the locations in the game. I do want to caution that all three cards (Snowguard, Hawk, and Bear) are on reveal. You must play these cards in lanes with the ability to trigger the card's effect. Playing these cards in the lane with cards like Cosmo or locations like Deep Space or Knowhere will not trigger the on reveal effects. Below, you will find some deck lists that include Snowguard. Have a BEWDiful Day!

Loki Snowguard

Silky Smooth Snowguard

Kraven
Miles Morales Spider-Man
Nightcrawler
Doctor Doom
Aero
Silk
Snowguard
Spider-Man
Wave
Jeff the Baby Land Shark
Iron Lad
Alioth

Bounce Snowguard

Zabu Darkhawk Snowguard

Galactus Snowguard

Control Snowguard


Cards in this guide
  • Snowguard
  • SnowguardBear
  • SnowguardHawk
  • SnowguardWolf
← All guides
snap.fan is not affiliated with Nuverse, Second Dinner or Marvel. | Privacy Policy | Terms & Conditions